 Save
Save My daughter came home from school one afternoon asking if we could pack something that looked as fun as it tasted. She'd grown tired of the usual sandwich routine, so I started layering vegetables by color across a tortilla, and suddenly lunch became an art project. These wraps turned out to be the easiest way to sneak nutrition into her lunchbox while keeping her genuinely excited about eating them. Now they're the first thing she requests when I ask what's for lunch tomorrow.
I'll never forget packing these for my nephew's field trip and watching him trade them with half the class because they looked so vibrant. His teacher even asked for the recipe, and when I told her it took less time than waiting in the school lunch line, she laughed and said she'd be making them all weekend. That moment made me realize these wraps had crossed over from being just another lunch option to becoming something people actually wanted to eat.
Ingredients
- Whole wheat tortillas: These hold everything together without falling apart, and they're sturdy enough to roll tightly without splitting. I learned the hard way that thinner tortillas tear more easily, so bigger and slightly thicker ones make the whole process smoother.
- Hummus: This acts as your flavor base and moisture barrier, keeping the vegetables from making the tortilla soggy. Any variety works, though roasted red pepper or garlic hummus adds an extra flavor layer if you want to get creative.
- Red bell pepper: The sweetness and bright color make this the star of the show, and they're crisp enough to stay fresh even hours later in a lunchbox.
- Yellow bell pepper: This adds a gentler sweetness that balances the other vegetables, plus it makes the visual impact unmissable when everything's lined up.
- Carrot: Julienned thin means it stays tender enough to bite through without being chewy, and the color contrast is crucial to the rainbow effect.
- Cucumber: This keeps things light and hydrating, though I always pat it dry with a paper towel to prevent the wrap from getting soggy by lunchtime.
- Purple cabbage: It's tougher than lettuce, so it holds its crunch for hours, and the deep color makes the rainbow pop visually.
- Baby spinach: Mild enough that even skeptics don't notice it, but it adds genuine nutrition without any bitter taste.
- Fresh herbs: A small handful of parsley or cilantro brightens everything up and makes the whole thing taste fresher, though it's completely optional if you're in a rush.
- Avocado: Creamy and rich, this elevates the whole wrap if you have one on hand, though the recipe stands perfectly fine without it.
- Feta cheese: A light sprinkle adds a salty, tangy note that ties all the vegetables together without overwhelming anything else.
Tired of Takeout? 🥡
Get 10 meals you can make faster than delivery arrives. Seriously.
One email. No spam. Unsubscribe anytime.
Instructions
- Prep your workspace:
- Lay your tortilla flat on a clean cutting board or counter, making sure it's not overlapping anything. This gives you room to work and prevents the tortilla from tearing as you fill it.
- Spread the hummus base:
- Use the back of a spoon to spread an even tablespoon across the tortilla, leaving about a half-inch border all around. This barrier keeps the vegetables from making the wrap soggy and distributes flavor in every bite.
- Build your rainbow:
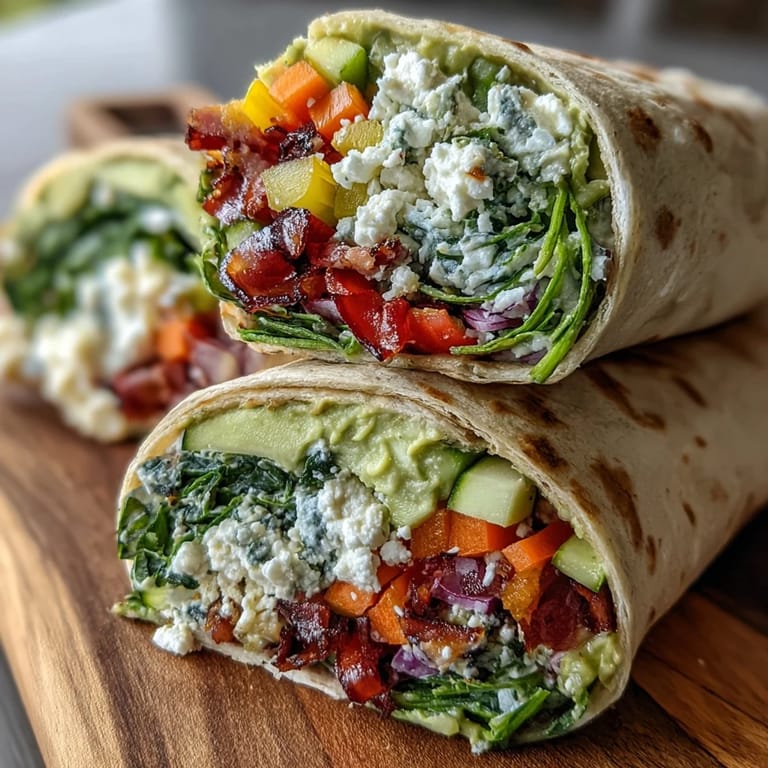
- Arrange your vegetables in horizontal strips across the center, starting with red peppers, then yellow, then carrot, cucumber, and purple cabbage, finishing with spinach on top. The key is keeping each vegetable in its own section so the colors stay distinct and every bite has a little bit of everything.
- Add the finishing touches:
- Sprinkle herbs, avocado slices, and feta cheese over the top of your vegetable rows. This is where you can get creative based on what you have or what you're in the mood for.
- Roll with intention:
- Fold the sides of the tortilla inward first, just a couple of inches, then roll tightly from the bottom upward like you're wrapping a gift. The tighter you roll, the better everything stays in place when you cut and transport it.
- Secure and store:
- Once rolled, wrap each wrap tightly in parchment paper or foil, then slice diagonally to make it easier to handle. The diagonal cut also makes them look fancier than a straight cut, which somehow makes people more excited to eat them.
 Save
Save One Saturday morning, my roommate watched me make four of these wraps and asked if I could make her two for her hiking trip. She came back that evening raving about how she'd eaten them on top of a mountain and how the colors had made everyone at the summit jealous. Since then, these wraps have become my go-to bring-along for any adventure, because they taste as good as they look.
Make Them Your Own
The beauty of these wraps is that they're basically a blank canvas waiting for whatever you have in your kitchen or whatever you're craving. I've thrown in shredded beets for extra color, swapped hummus for cream cheese when I ran out, and even added grilled chicken when I wanted something more substantial. Once you understand the basic formula of spread, vegetables, and roll, you can riff endlessly without breaking anything.
Timing and Meal Prep
These wraps are one of the few recipes that actually taste better when you make them the night before because the flavors meld together slightly overnight. That said, the absolute latest you should make them is a few hours before eating, especially if you're using cucumber or avocado. I usually prep all my vegetables Sunday evening, store them in containers, and then assembly takes just five minutes on any given morning when I need a quick lunch.
Transport and Serving
The parchment paper or foil wrapper isn't just for looks, it actually keeps everything from falling apart when you're eating on the go. I've learned that wrapping them diagonally creates natural breaking points, so you can eat them in two bites without ingredients tumbling everywhere. Pack them in a lunchbox with a small container of fresh fruit, some nuts, or a few cheese cubes, and you've got a complete meal that comes together faster than takeout.
- If you're packing these for later in the day, stick them in the fridge until right before you head out so the vegetables stay extra crisp.
- Transport them in a flat container so the wraps don't get crushed, which is harder to fix than it sounds.
- These actually pair perfectly with a light dressing on the side, like ranch or a simple lemon vinaigrette, though they're delicious completely plain.
 Save
Save These wraps have somehow become the thing I make most often because they hit that sweet spot between being genuinely nourishing and taking zero time. Every time someone tastes one, they're surprised it's not some complicated recipe, which makes me feel like I've uncovered a small kitchen secret worth sharing.
Recipe Q&A
- → What kind of tortillas work best for these wraps?
Whole wheat tortillas provide a sturdy base and complement the fresh vegetables well. Gluten-free tortillas can be used as an alternative.
- → Can I substitute hummus with another spread?
Yes, cream cheese or dairy-free spreads make good alternatives to hummus for a different flavor profile.
- → How can I add protein to these wraps?
Grilled chicken or tofu can be added to boost the protein content without sacrificing freshness.
- → Are the vegetables prepped in a specific way?
Slicing bell peppers thinly and julienning carrots and cucumbers helps create neat, colorful layers in the wrap.
- → What tips help keep the wraps fresh and easy to eat later?
Rolling the wraps tightly and wrapping them in parchment paper or foil ensures they hold shape and stay fresh until mealtime.